Tri 101: Do I Really Need That?

I talked a little bit about what a triathlon is last week, so I though I would continue my “Tri 101” series by talking about what you need. There is a ton of gear out there, but for your first few races you need to have certain things covered 100%.

What to wear?  This is a question I had before my first race too, and finally I think I can give some pretty good choices.

  • Swimsuit (I suggest a sports bra underneath) + Shorts (for the bike and run) + optional shirt (for bike and run) – This was what I wore for my first race without the shirt.

  • One Piece Trisuit – There are a lot of benefits to wearing a one piece trisuit.  The first being no need to change and they are made to fit skin tight for swimming.

  • Two Piece Trisuit – The main advantage of the two-piece over the one piece is that you can take off the bottoms if you have to use the port-a-potty in a longer race.   Some also come with built in sports bras.

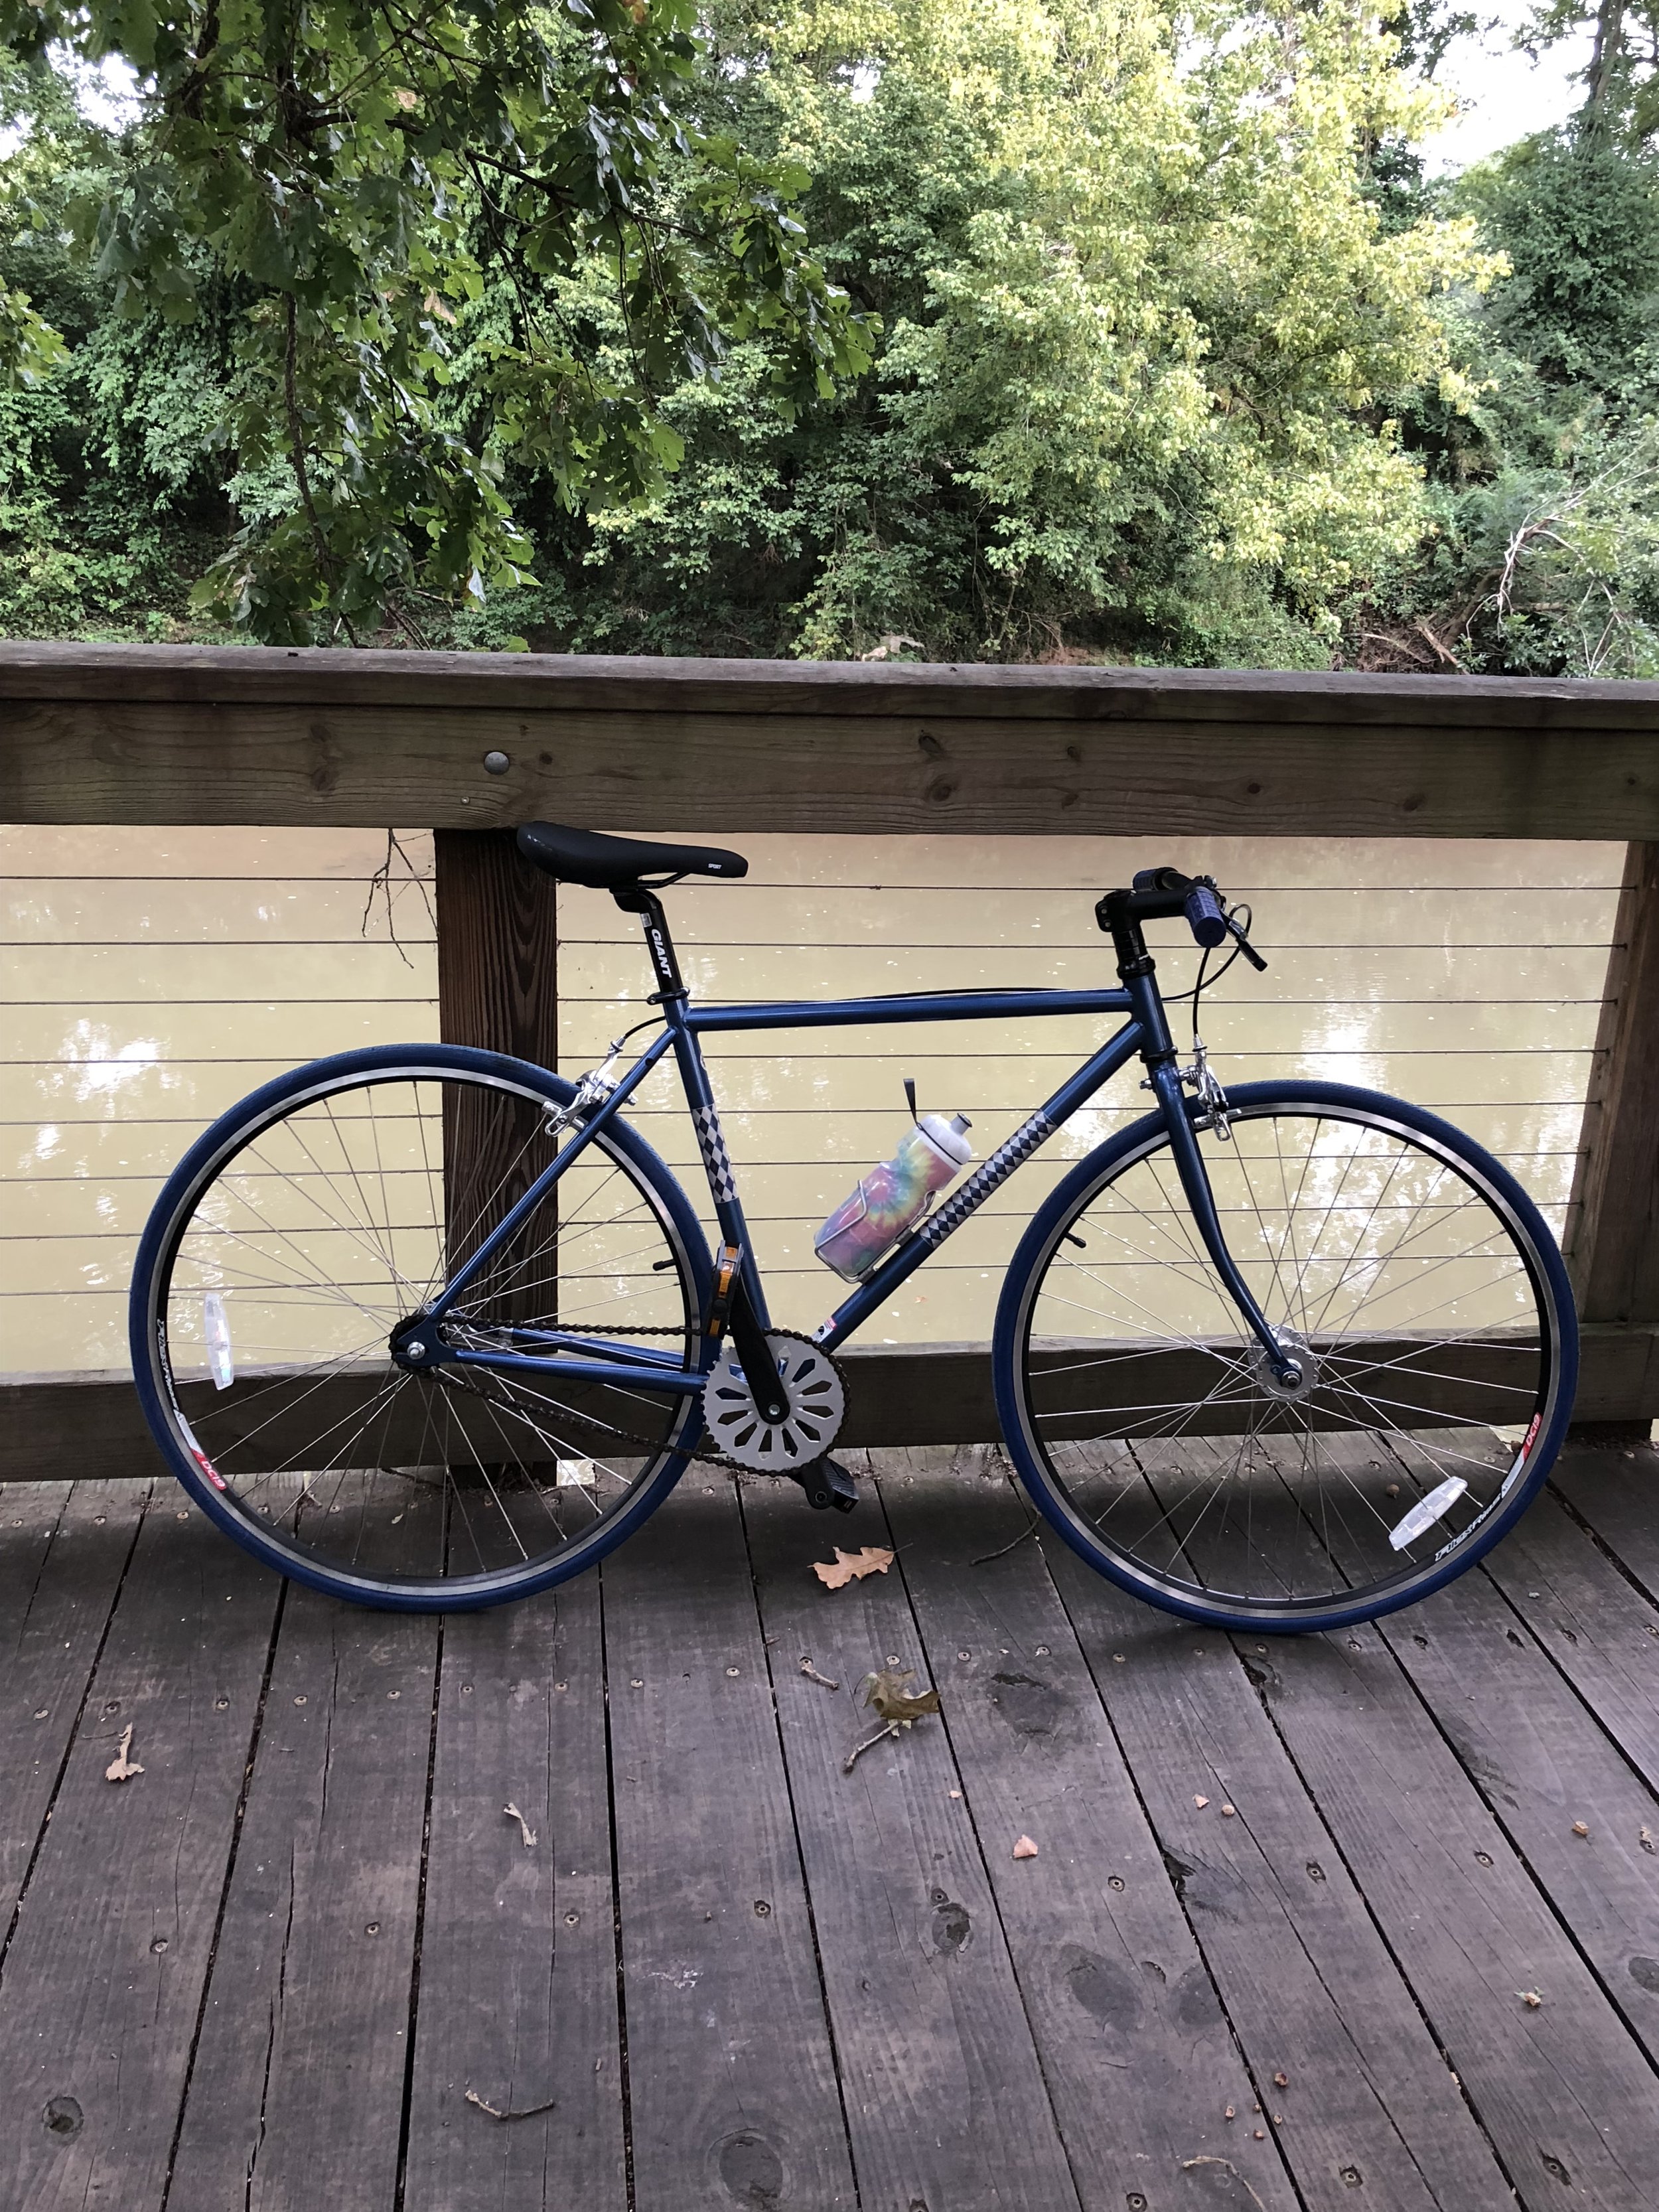
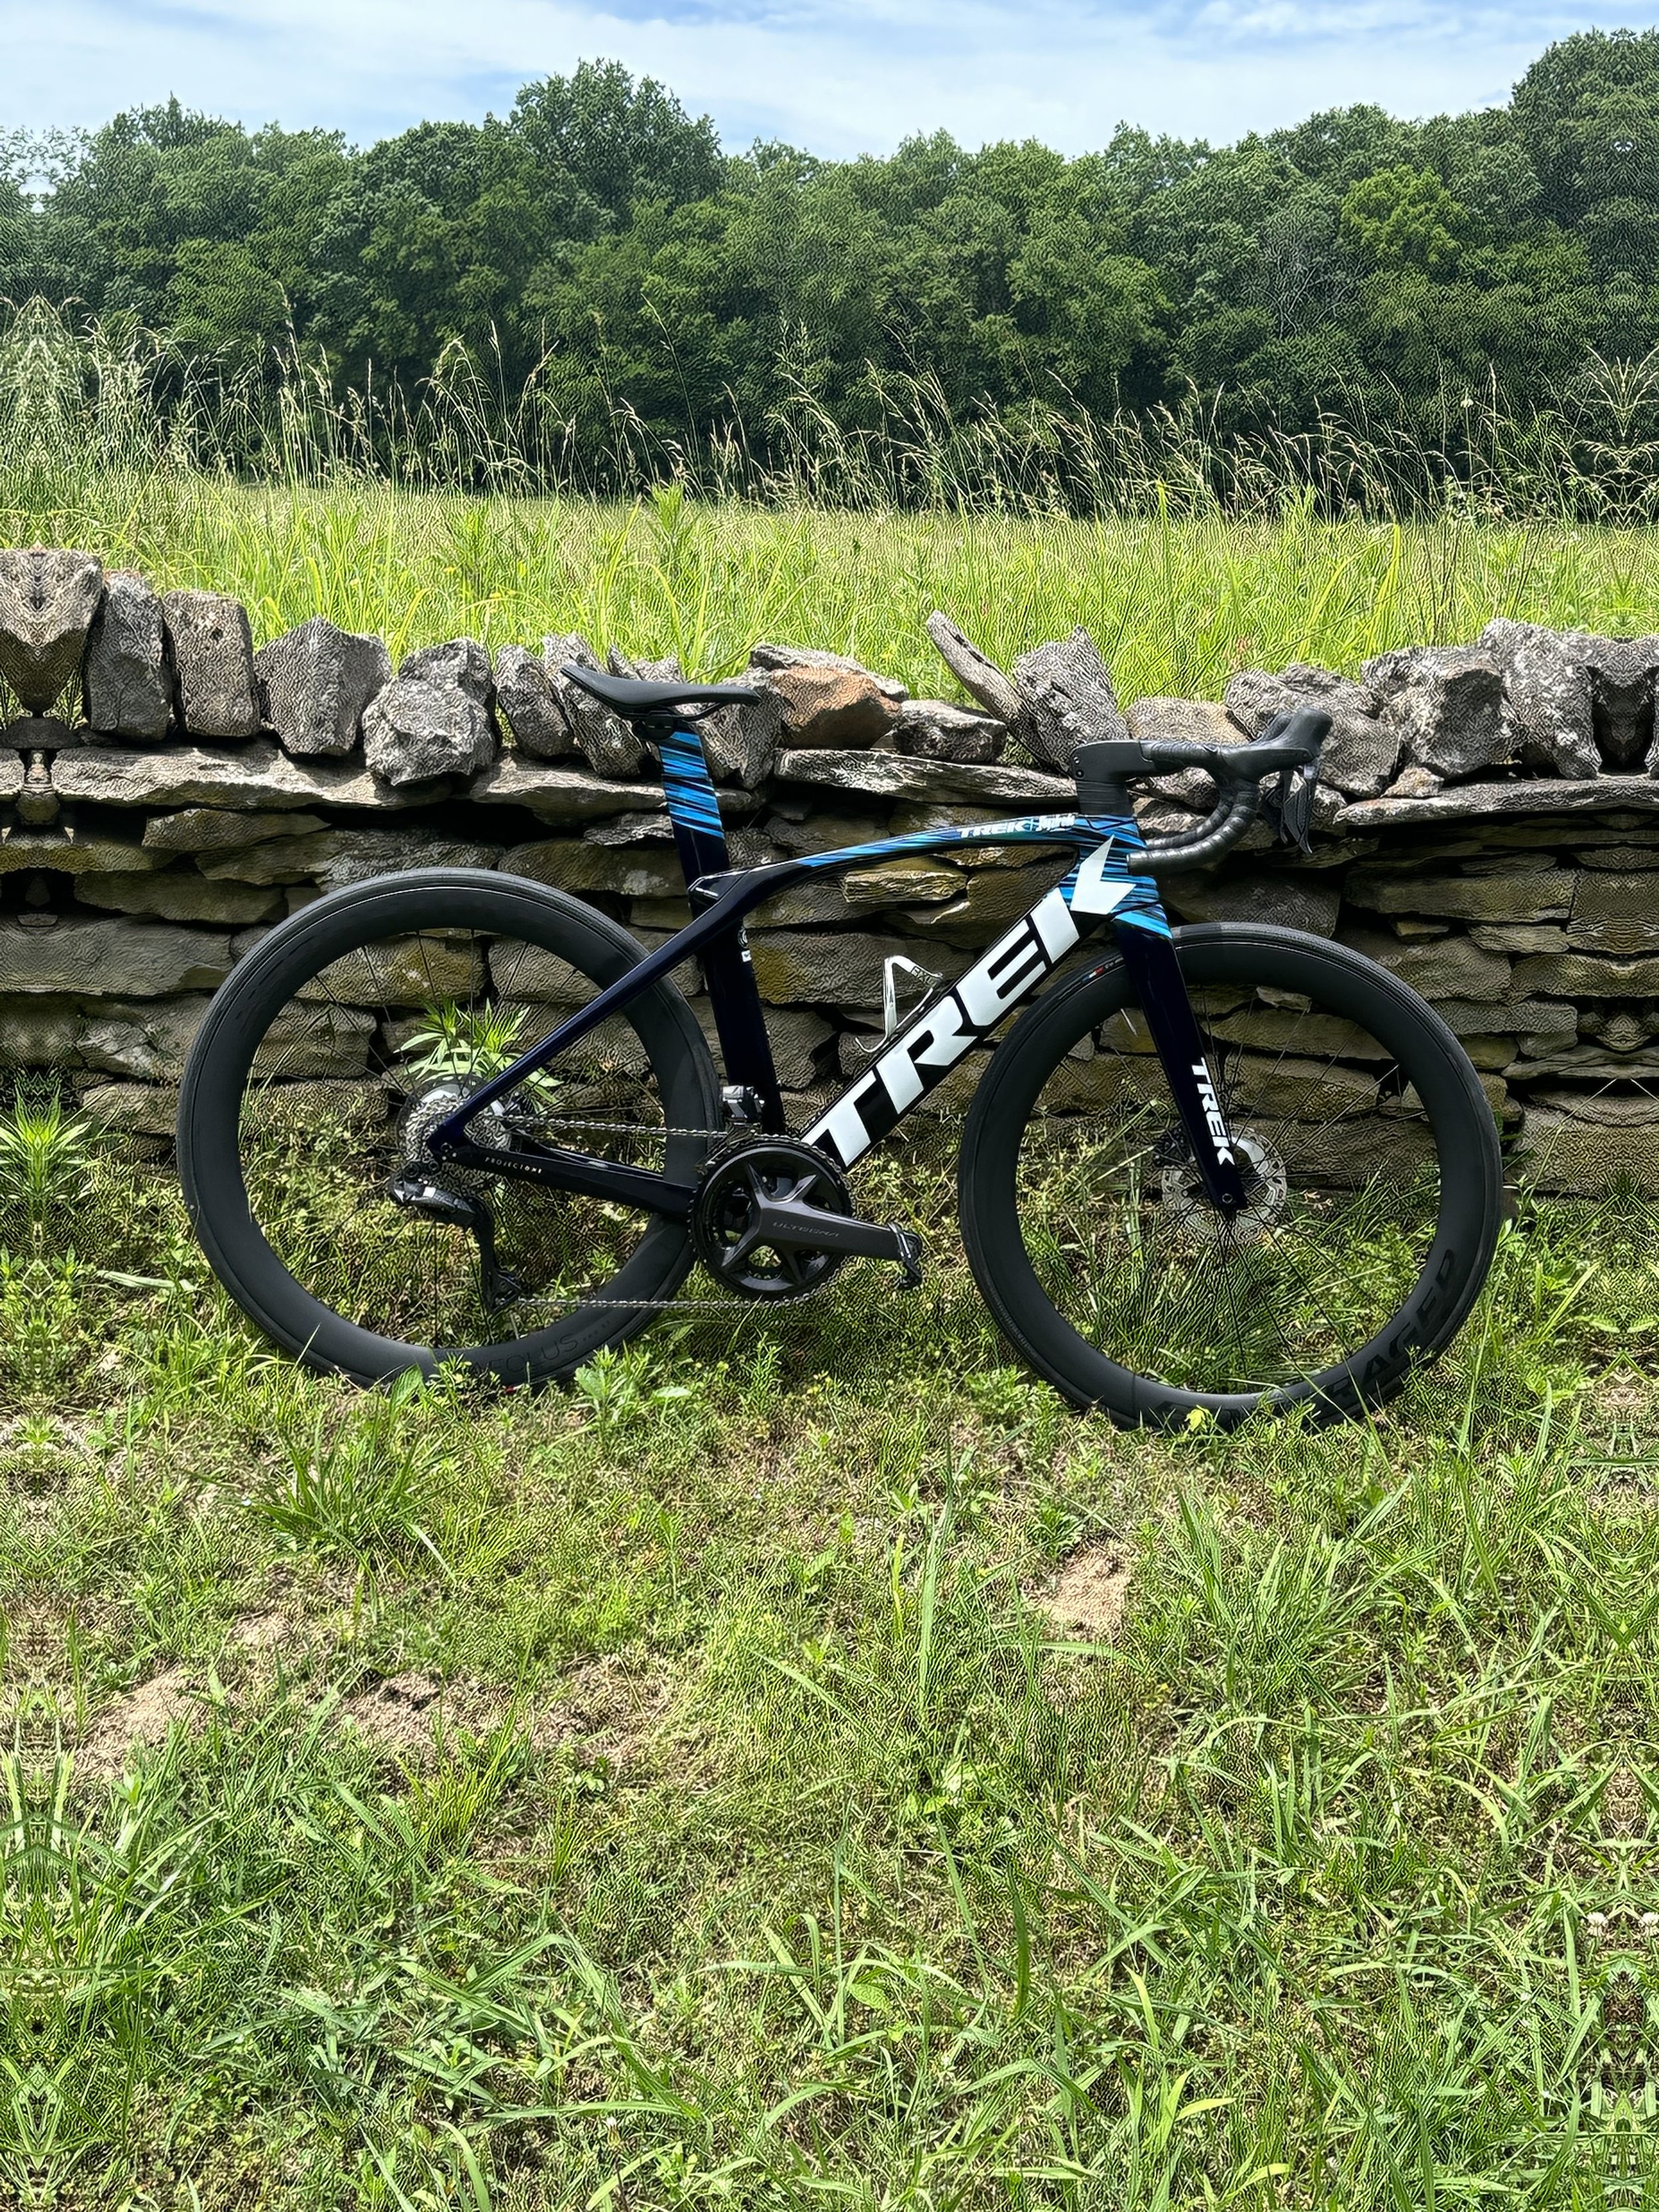
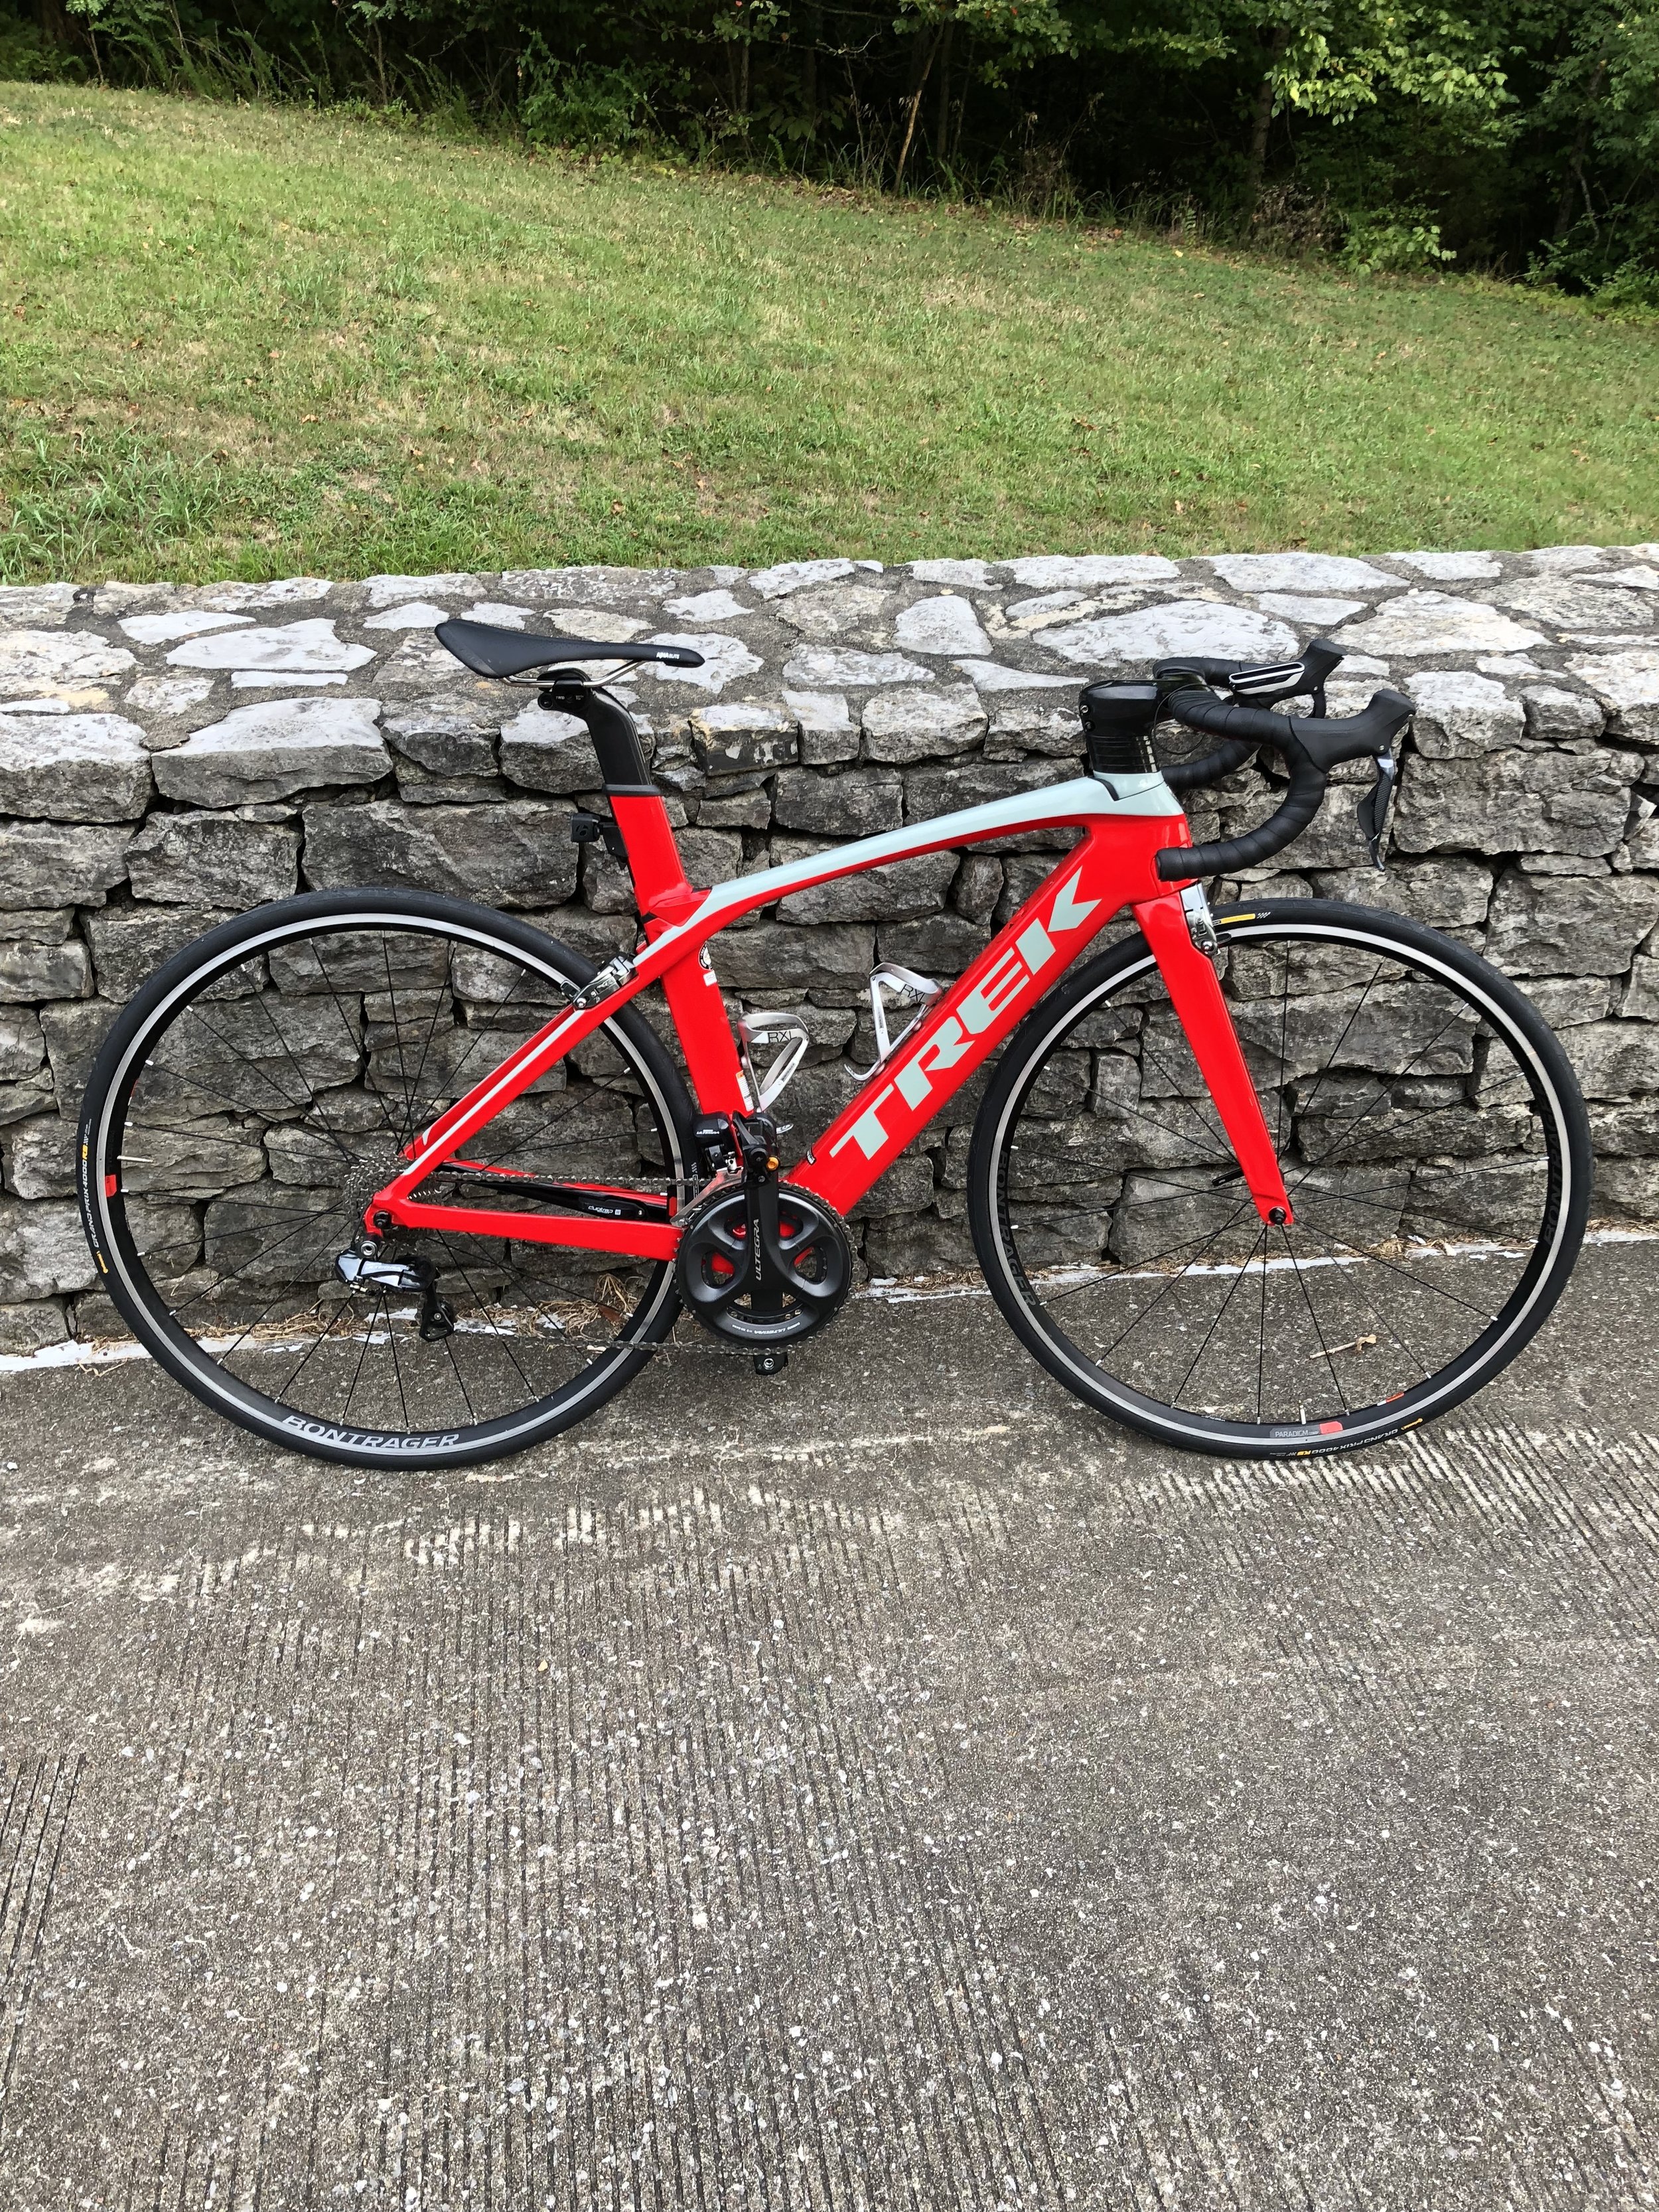
Do I need a fancy bike with bike shoes?  No.  I raced on a rental bike wearing running shoes for my first race.  I do suggest a road bike, not a mountain bike, especially if you are doing anything over a sprint.  Road bikes are much faster, and you can train on whatever you have then rent one for the day of the race.  Honestly, make sure you are committed to the sport before investing in the bike and the shoes.  This way you can also do it gradually.  I went from rental bike, to road bike, to road bike with shoes and nice pedals, to my carbon tri bike, and then I also finally after over a year upgraded to a nicer helmet than my original helmet from Academy.  If you are sticking to it, you have plenty of time for upgrades.

What gear to I absolutely need?  There are some things required, and some things I think you should absolutely never race without.

  • Something to wear – As I talked about above.

  • A bike – See the above on that one.

  • Running shoes + socks – Depending on your level of racing and your gear, you may be wearing these for the bike and run, which is perfectly ok.

  • Something to hold your race number – Races will usually supply pins, which you probably don’t want to put through your tri suit, or deal with in transition, so I suggest investing in a race belt early on.  Saves time and your gear.

  • Swim cap – For open water this will be provided by the race, but for a pool swim you need to have your own.

  • Goggles – I highly suggest spending over $20 on a nice pair, like my Speedo Vanquisher 2.0’s that I’ve used forever.

  • Water bottle – This goes on your bike, and you will drink from it.  Trust me, no matter how you feel, drink something.  I use electrolytes in one, water in another.

Do I need a wetsuit?  Yes or no.  This is a personal choice.  If you are not comfortable in open water and it is cold enough for one, you may be more comfortable with the extra buoyancy and warmth.  I don’t like wearing one very much, but I do own one, which I got because, although I am a strong swimmer, I am not comfortable in open water very much, so I wore it for my first Olympic.  If you wear a wetsuit put Bodlyglide on your neck for chafing and you will thank me.

What optional gear is there?  When you think you have enough gear, there is always something else.

  • GPS Watch

  • Heart rate monitor

  • Power Meter

  • Cadence and speed sensors

  • Aero helmet

  • Race wheels

  • Shoes + pedals

  • Compression socks

There is so much I could never list it all.

Tri 101: You Signed up for What?

This is going to be the first post in an updated version of a series I ran on my old blog called “Tri 101”. The goal is to create a set of simplified resources to assist individuals who have signed up for or are considering signing up for their first triathlon. I am going to utilize the information I previously shared as well as things I have learned in more recent years to provide a free resource for people who are just starting out.

You signed up for a triathlon.  A lot of people will ask you why you are paying to go do up to 17 hours of cardio depending on your race distance, and everyone has their own reason.  A lot of triathletes come from a single or double sport background, or sometimes even no athletic background, so there is a wide variety of people getting involved in this quickly growing sport. This means you are not the only one who is probably looking for guidance on getting started.

Now what do you do?  The first thing to do is figure out your plan.  Are you going to be like me and not really train much because you think you’re just that good?  Go for it.  Are you going to follow a training plan or find some form of consistent training?  Go for it.  Just make sure you know whether/how much you are going to train, and plan out all of the gear you are going to need.

When deciding what your plan is, know what you are getting yourself into.  Below is a breakdown of the distances.  If you aren’t much of a swimmer you are going to want to be in the pool for a little bit before attempting an Olympic.  It is all about being realistic about where you are and what you are attempting to do. If you don’t have a ton of time to train and are really strong in a single discipline, maybe spend more time on the other two and do just enough to maintain your strength in the third, or if you are new to all three, prioritize where you think you can make the most gains in the time you have available.

You also need to keep in mind that there is more to doing a triathlon than just doing three sports.  Maybe you can accomplish the three distances on their own, but you have to consider what it is going to be like to do them all together.  This is especially important when it comes to running off the bike, where your legs will feel like jell-o the first time you try it.  No matter what distance you’re racing, at least a couple brick workouts leading up to it is going to help a lot with that, because while transitions may be easier to learn, getting a feel for going from swimming to standing immediately or from biking to running does require some training to adjust.

My next post in this series is going to be all about the gear you need as you prepare for your first race.

How I Take Photos of my Bikes

Anyone who has watched the GCN Show can immediately point out the errors in my photos below, and I never thought I would say this, but I am a bicycle photo snob in addition to just being a bike snob. I even started an entire instagram page dedicated to photos of bikes (bicyclesnearroads). Let’s walk through what I do to try to get the best photo possible of my bikes.

Let’s start with the most basic thing, lighting. When I start a ride looking for somewhere to take a photo of my bike, I am looking for the angle of the sun. There are a lot of fences and walls on my typical route, so I usually figure out which side of the road is going to have the sun facing toward it and use that side to take the photo. I have also found midday is the best time (if it isn’t too hot) because the higher angle of the sun helps to minimize odd shadows. The best sunlight I have probably ever gotten was with my old Madone in the picture on the left.

Once I find the spot and the sunlight, I like to take off my water bottles, because they do typically clash with the look of my bikes, especially if they’re a different color. I always have water with me, but you will almost never see it on my bikes in the photo, except some from before I considered myself a professional bicycle photographer.

Then, I get into the things you will hear if you’re watching the GCN Show, which include lining up the crank so it is parallel to the ground and making sure the wheels are straight. Another one I have picked up is lining up my wheel logos. My newer try bike has Enve wheels with white logos, and I learned with one of my earlier photos of it that it is difficult to get them right. I also found that the logos on those wheels look best when lined up horizontally.

Finally, I like to keep it fun. I have multiple bikes, so I like to get photos of the really nice road bike, and also of the single speed bike I used to get to campus in college (and the cool tie-dye water bottle).

Week 1: Zone 2 Training

My first week of zone 2 training has been interesting. As mentioned previously, I have my spreadsheets to track my running and my weight to control for any weight loss, but I am not sharing any of that for a while, because I don’t have any results to share yet. What I am going to share will be my week of training, how it felt, and anything I noticed or found helpful.

Screen Shot 2021-01-27 at 9.43.30 AM.png

Monday: Zone 2 run. I wrote about this with my first zone 2 running post, so I will not go into much detail. I walked a lot, and I let my heart rate settle down to zone 1 when walking.

Tuesday: Nothing. I felt tired, and unmotivated. I did a lot around my house though.

Wednesday: 45 minute zone 2 bike. It was sort of zone 2, but I was on a hilly route, so I let my heart rate climb up a little during the climbs and settled back into zone 2 on the descents and flats. I have to pay close attention on descents to keep it from dropping too much. This means shifting up a gear or two and keeping my cadence up.

Screen Shot 2021-01-20 at 2.04.53 PM.png

Thursday: Swim in the middle of the day. I felt pretty good and had time to get in some extra distance, so I made it 3300 instead of my planned 3000. I also had another zone 2 run that afternoon. I felt like I ran a little more in the beginning compared to Tuesday, but less near the end. One of the recommendations I got from Triathlon Taren is to run more to improve efficiency on the run, so I am aiming for 3-4 runs per week right now.

Friday: Swim in the morning. This was another 3000 with some speed in it. I back off a lot on speed workouts due to an old shoulder injury at the moment, so anything “sprint” or “all out” is actually just strong. I also did 30 minutes of stretching and core work in the evening. As I mentioned in Triathlon Training and Tax Accounting I am planning on trying to focus on strength and mobility to prevent injury.

Saturday: I was super tired Saturday morning, probably from my early morning to swim Friday, so I slept in before working at the bike shop for the day. When I got home from working, sleeping in meant I had to get in my 1.5 hour bike ride. I picked a pretty hilly route for it, which I do a lot on Zwift, and I like that choosing hilly routes means I think less about speed and more about heart rate and the purpose behind the workout. My heart rate still got a little high on a couple hills, but it was returning very nicely when I slowed down, which is a good sign.

Sunday: My long “run” day. I have found a shuffle that I can stay in zone 2 under the right conditions with. I ended up with a few extra minutes past the forty-five I planned for this workout, and it went very well, or as well as a run/walk when I really want to run can go. The really positive thing that has come from all of this is that I can do longer workouts without feeling like I am dying at the end. The distance may not be there yet, but the time is, so as I get faster (hopefully), my distance should build up without increasing time. Of course I am increasing time as well.

Overall, this last week went really well for me, and it felt good. I haven’t actually felt this good training in a while, and my current week is off to a good start. I think not working for two weeks has something to do with it, but I have also made a few other changes, like trying to eat better and taking a vitamin D and B12 supplement. The vitamin D is under the recommendation of my doctor and the B12 is just what else was in the one vegan vitamin D gummy I could find online.

This week I am starting to incorporate some intervals into one of my run and bike workouts each week. On the run it will be on my hard run day and will be heart rate based, while on the bike I am just going to continue with hillier routes, but also push a little bit more for short periods of time.

Basic Group Ride Etiquette

Recently, I have had the opportunity to begin to go on group rides a little more, although my pace is unfortunately slow at the moment. I feel like I am finally when in a group getting the hang of drafting and riding with people, where previously I rode a lot on my own and people made me nervous. When you ride alone, you don’t have to worry about drafting or someone behind you, but in a group there are a lot of other potential issues.

IMAGE.JPG
  1. Know your pace. Right now, I am with our C group, which is 14 mph and up, but when I am in better shape, I am a B group rider, which averages 17 mph normally. Typically you will be faster in a group than on your own, but pick the group that is your speed and stick with it. Normally you will all progress similarly, so you still have a good group to ride with. If you are on a group ride that is a little faster than your usual pace, but you can hang on, sit on the back and let other riders know you are staying on the back.

  2. No aero bars. You can ride your Tri bike with some groups, but no getting in aero bars when in a group on a road or Tri bike. This is for the safety of you and the other riders. I don’t care how good your bike handling is. If have to brake for a sudden red light and you’re behind me in your aero bars, there is a good chance of us both crashing.

  3. Know your pace lines. Most groups employ either a single or a double pace line and will have their set ways of pulling off to the back. In a single pace line, the rider in front will typically signal they are moving to the left and going to fall to the back. In a double pace line the riders will sometimes split to the left and right, or they will both move left, so I suggest starting in back or asking if you are unsure of how the group tends to ride. My biggest pet peeve is in a double pace line when the person next to me will ride between two people instead of on their wheel.

  4. Know your signals. The two most basic are your turn signals for left and right. Beyond that, we also want to point to either side and announce things like glass, potholes, and gravel. I also suggest knowing signals for slowing/stopping, and announcing this as well.

  5. Announce cars. If you hear a car and you are in the back, call out that there is a car back, so everyone is aware and if you need to move to a double pace line you can.

  6. Maintain a steady pace when pulling. This can be a fast pace, slow pace, or a moderate pace depending on the ride, but the goal is to maintain the pace the ride is intended to be. If you are about to pull, look on your computer to see your current pace and try to maintain that when on the front to avoid going too hard, which is easy to do.

$700 v. $7000 Bike: What is the Difference?

When talking to my husband, I frequently hear how he does not understand my bicycle obsession, because it is just a bike. I understand, because I used to be him. Until I worked in a bike shop, I knew nothing of the different between my 8-speed Claris components and 10-speed Ultegra components and the new 11-speed groups. The only difference I knew was carbon fiber versus aluminum, and for me all that meant was weight savings.

The $700 Bike

IMAGE.JPG

My Trek Lexa purchased in 2012 brand new. It is a full aluminum frame and fork. It had Claris 8-speed components, externally routed cables, and aluminum wheels. This was my dream at the time. I had barely ridden a road bike. it was lighter than the mountain bike I had to ride around campus, and it was purple. It also came with pedals with toe clips and straps.

The $7000 (approximately) Bike

IMAGE.JPG

My Trek Madone. The first bike I bought for myself. It is a carbon frame, fork, steerer. It has lightweight aluminum wheels, Ultegra 11-speed electronic components, and is red, which automatically means it is faster. It is also an aero frame with hidden cable routing.

Where does the $6300 come in?

Carbon Frame & Fork - It is more responsive, stiffer, and absorbs vibration from the road better than aluminum.
11-speed components - The number of gears alone creates smoother shifting. In addition, this system being electronic means I can shift with the click of a button and there is not a long lever throw, especially for the front shift. This makes for faster shifting, especially going up hills.
Lighter Wheels - Another weight saving move. The wheels I have on the Madone are also a little stiffer and have a wider rim, so they fit 700x25 tires better the the ones on the Lexa.
Hidden Cable Routing - I am not talking about just cable routing that is mostly in the frame. I mean you don’t see the cables on this bike. This is not only protecting the cables, but it is also reducing some air drag (although if I shrink myself that does it too).

The Real Question

Does the $7000 Bike Make Me Happier?
I don’t know. I love both bikes. I tell people I will never get rid of my Lexa, because it was my first bike, but I would sell the Madone for the newer Madone SLR 7 Disc, and I would upgrade to carbon wheels, so I guess what I am saying is that you do get something for your money, but there is nothing that can beat the feeling of having something that is yours and allows you to feel as free as I did on that first bike. I have upgraded some parts of course like any good bike mechanic would on the Lexa.

Cycling Accessory Essentials

Depending on where you ride and what type of bike you have, you will have certain accessories you need. 

Things Everyone Needs

Helmet - You only have one brain, so you should protect it.  All helmets sold in the Us should meet certain standards of safety, but I always recommend one with MIPS in it, which protects your brain in a rotational impact by absorbing extra energy.

Lights - You need to be seen.  At a minimum you need a tail light that has multiple flashing and steady modes.  I recommend rechargeable lights, because they can be brighter than battery powered.

Road ID - Even if you ride with other people all the time, they don’t know your allergies, emergency contact, or any other relevant conditions in case of an emergency.

Flat Kit - You don’t want to be that friend who always needs a tube or a tool.  A well prepared rider will always have a flat kit with a tube, tire levers, CO2, and a multi tool.

Floor Pump - I have had to change flats and then sell someone a pump, because they didn’t know to air up their tires every time they rode.  Proper tire pressure is extremely important to your ride and not getting flats.

Things Roadies Need

Trek Madone 9 Series

Shorts or Bibs - I will admit I didn’t give in to this for a while, and I wish I had earlier.  Proper riding shorts makes a huge impact in your ride quality, especially on a road bike.

Jerseys with pockets - I say pockets, because they’re extremely convenient.  I always put my phone in a plastic bag and put it in my jersey pocket in case of an emergency.

Bottle Cages - I put this under road, because on a mountain bike people often use a hydration pack.  You need to be drinking a lot so you do not end of dehydrated when riding.

Short Finger Gloves - Not for everyone, but a lot of people like short finger padded gloves to relieve extra pressure.

Things Commuters Need

IMG_3314.JPG

Fenders - If you are commuting you may run into rough weather more than others.  Fenders can help to keep excess water off you and your clothes.

Rack - A rack can be useful for adding a bag or panniers to carry work and keep it off your back.

Bags - As mentioned above, bags carry things so you don’t have to.  They also have waterproof bags to protect electronics and chargers.

Soap - Anything you need to be clean and smell good to your coworkers.

Things MTB Riders Need

IMAGE.JPG

Hydration Pack - As mentioned with roadies, hydration packs can be useful for mountain bike riders, where some full suspension bikes don’t even have bottle cage mounts.  This is so you have adequate hydration and control.

Knee/Elbow Pads - Protection.  Not necessary for everyone, but useful the more aggressive you ride.

Shorts - Just like the road bike, shorts can be important on the mountain bike.  Some people prefer baggy shorts for extra protection with a liner short for cushion and to prevent chafing.

Jerseys - On a mountain bike, your jersey and whether it has pockets or possibly longer sleeves is your choice.  Longer sleeves and a looser fit can be protection and comfort with the movement of mountain biking. 

Long Finger Gloves - Again the theme of protection, because long finger gloves can protect in falls and from passing branches and other items.


Buying Your First Bike

I bought my first bike without seeing it.  It was a 2013 Trek Lexa C that was my favorite color, purple, with Claris components.  I knew nothing about bikes, and I was so excited to have a real road bike and not a Walmart bike.  Where I was in my life, this bike was perfect and the most exciting thing in my life.  Now, if you are paying this price, you do want to put some time and effort into thinking about the decision more than I did.

Anatomy of a Bicycle

Step 1

Know the categories of bikes.  There are multiple categories including road, mountain, hybrid.  In road bikes, I also include cyclocross, gravel, triathlon, and touring bikes.  Mountain bikes can further be separated into cross country, enduro, and downhill.  Hybrid bikes can be separated into fitness, comfort, and dual sport.  There are other categories, but these are the most easily defined.

Determine what your goals are to know what category you fall into.  I wanted to do triathlons, and nothing else, but I wasn’t good enough with handling to go with a triathlon bike.  Your goals could be riding mountain bike trails and going out west to ride, which would need a full suspension mountain bike.  You could want a bike to commute to work or the grocery store with a rack and panniers, which could be a road or a hybrid bike.  Once you know wha you want to do, you can narrow down what category you fit in.

Step 2

Know what causes the variation in price of bikes.  When looking at two bikes in the same category the things that set them apart are material, components, and suspension. 

Frames come in a multitude of materials at a multitude of price points.  Majority of bikes sold in bike shops are aluminum or carbon fiber, but you will also find steel and titanium bikes as well.  Typically, carbon fiber is one of your lightest and can be your most expensive bike.  You can still find very lightweight aluminum bikes as well, and they tend to be more budget friendly.  Your frame material may be dictated by your budget.

Drivetrains are one of the most complicated parts of the bike to explain, so I am going to make it as simple as possible.  More rear speeds is smoother shifting on all bikes, while whether you choose to use a front derailleur can be dictated by the type of bike you choose. 

Most categories of road bikes have two front gears and anywhere between 8 and 11 in the rear.  Cyclocross bikes and mountain bikes are where the single front chainring has become popular as we can run larger gear ranges in the back and it saves weight. 

The other major part of drivetrain to consider on a first bike is the brakes.  The most common options are rim brakes and disc brakes.  Mountain, cyclocross, and gravel bikes are almost all coming with disc brakes currently.  Disc brakes don’t wear down rims and they have more braking power than rim brakes.  Road bikes and hybrid bikes still come with both options, so it comes down to if you will find value in the extra stopping power and ability to brake in more conditions.  Disc brakes also come in hydraulic and cable operated models.  The stopping power is the same, but as the pads wear down, the hydraulic brakes will move the pads in so you don’t lose and stopping power.  They may need to be bled in a few years, but they do not require the same cable adjustments of a mechanical (cable) disc brake. 

When combined with frame material, drivetrain will help to narrow down the options.  You may also find a carbon bike with 11 speed components is out of your price range, but an aluminum with it is within your range. 

Step 3

Find your size and test ride.   I highly recommend talking to a professional in a bike shop for size.  I am 5’5” and I ride a 52 cm Trek Domane, where my boss is 5’5 1/2” and rides a 50 cm, so size charts can only help so much.  I also ride a 50 cm in a Trek Madone and a 49 in another brand, so the size on the bike only dictates an estimate.

I also recommend test riding any comparable bike to what you are intending to buy.  A shop may not have the exact model, but they may have the same size in another model or another model with the same components.  This will give you a feel for the position and a feel for the components, although it may not be the exact bike. 

Step 4

Buy a bike and go ride.  I also recommend certain accessories, which will be found in my next post. 

This bike buying process should help you whether you are buying a hybrid to ride with thbike kids or a super aero triathlon bike to race at Kona.